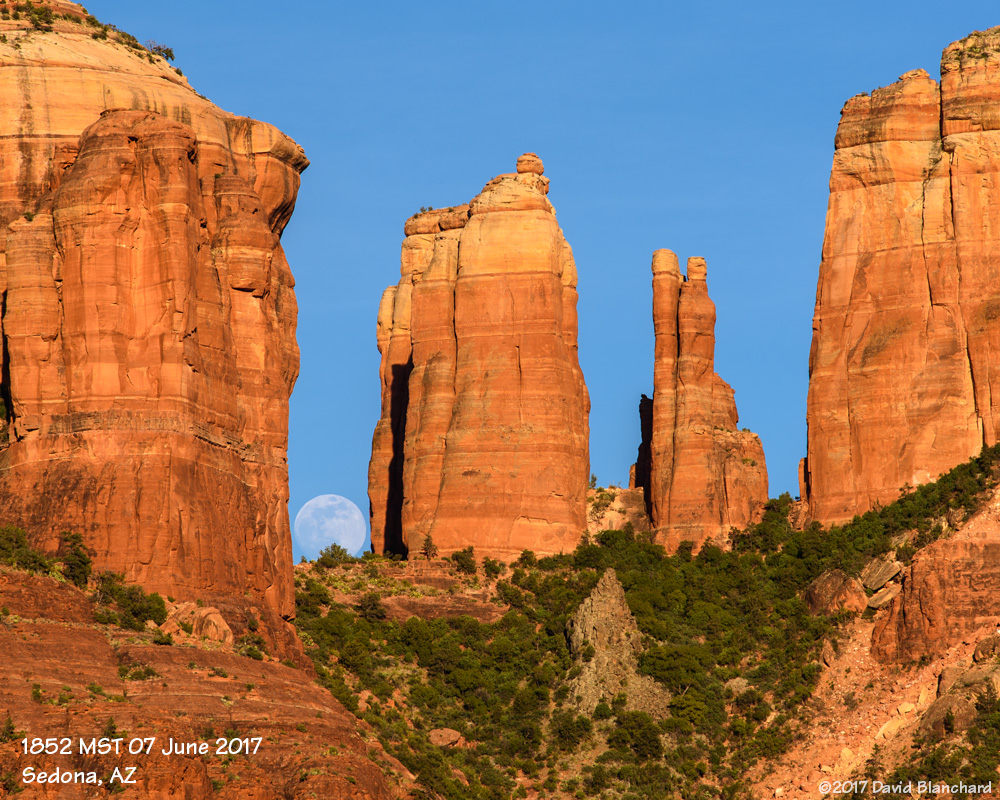
The June full moon is known as the “Strawberry Moon” and will occur on June 9, 2017 this year. I enjoy photographing the moon the day (or two) before the full moon. With the moon rising before sunset, Cathedral Rock is still sunlit and provides a striking contrast with the moon.
Moon rise behind Cathedral Rock, Sedona, Arizona.
The photograph was taken at Crescent Moon Picnic Area on the banks of Oak Creek. The full moon this month is a MiniMoon, the opposite of the so-called SuperMoon. This means that the disk of the moon is smaller than average as the moon is at apogee, or its farthest distance from the Earth. If it had been at perigee (closest distance), the disk of the moon might have been larger than the gap.
Or I could have just shot the photograph from farther away.
This is similar to an image taken last year in the same location and about the same date. As with that image, this is also a composite of two images. The first was taken of Cathedral Rock as the moon was setting in the west. An exposure of 120 seconds at ISO 400 and an aperture of f/4 was used. The second image was taken a short time later after the moon had set allowing the fainter stars in the night sky to appear. This image was 5 minutes at ISO 400 and an aperture of f/4. To prevent streaking of the stars an iOptron Sky Tracker was used. The two images were then blended together.
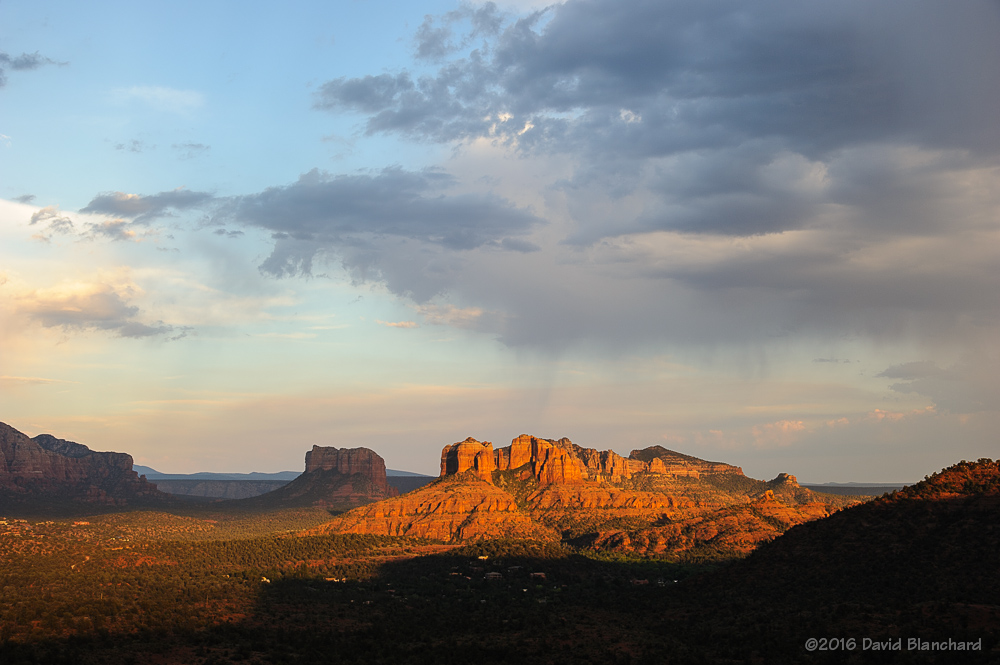
The North American Monsoon (NAM) is slowly developing across northern Mexico but has not yet spread northward into Arizona. Nonetheless, some tropical moisture moved northward across the state and produced some showers and thunderstorms. In fact, one thunderstorm produced almost 1/2 inch of rain on the southwest side of Flagstaff (including my house!) and the temperature dropped more than 25°F resulting in pleasant conditions.
These storms produced a cool outflow boundary that pushed southward off the Mogollon Rim and into the lower elevations. These outflows can result in new thunderstorms forming over Sedona—one of my favorite places for photographing storms and lightning. And so I headed to Sedona.
The outflow boundary was apparent as a line of shallow cumulus clouds roughly aligned east to west across the area. I selected a spot on Upper Red Rock Crossing Road to shoot towards Cathedral Rock and then waited for lightning.
Evening sunlight spreads across Cathedral Rock.
It was a long wait.
From first test photo to first lighting was a little over an hour. I’m patient but I almost gave up.Then, suddenly, a flash across the sky. Missed it—because I was zoomed in too tight. A moment later—another flash and this one I got. And that was it. No more flashes.
Lightning strikes behind Pyramid Peak.
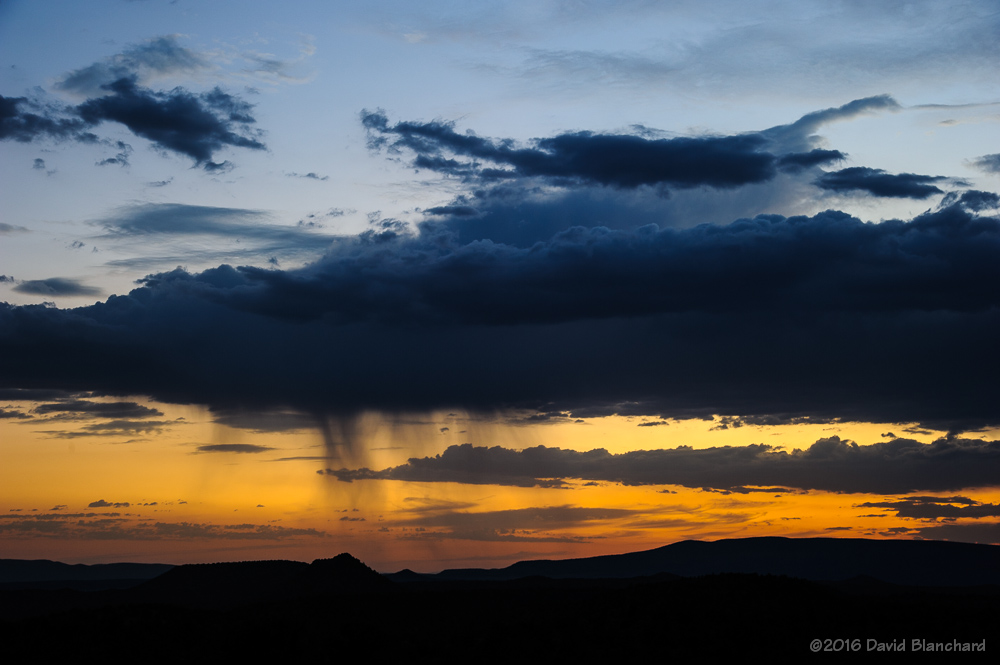
Time to move to another location and shoot twilight colors. I often find myself at the defunct Sedona Cultural Park because it has wide open vistas to the west (at least for now). I arrived as the sun was setting and everyone else was leaving. But the so-called “Blue Hour” can be the best time. If you take long exposures, you can get some really nice colors. I particularly liked this cloud because of the thin streamers of precipitation falling with twilight colors in the background.
Thin streamers of precipitation fall as the twilight fades.
A day later and the moisture has moved out of the area resulting in more typical hot, dry days with clear blue skies. Boring.
A few weeks ago I attempted to photograph the nearly full moon as it rose from behind Cathedral Rock in Sedona, Arizona. On previous shoots of this type, I have used The Photographers Ephemeris (TPE) to determine where I should be located so that the moon will rise between the spires of this rock. My experience with TPE has been very good and typically I only have to make small adjustments to my position to get the perfect alignment.
For this event, I used TPE but I also wanted to test PhotoPills, an iPhone app. One of the features of PhotoPills is AR (“augmented reality”). What AR does is use the phone camera and superimpose the position of the moon and its track on the image seen by the camera.
As I approached my shooting location (as previously determined by TPE), I checked my position using PhotoPills. PhotoPills was telling me that my position needed to change; i.e., that I was already too far south and had to move back to the north. According to PhotoPills, the moon would rise to the south (right) of Cathedral Rocks. I was fairly certain at this point that TPE was right and PhotoPills was wrong.
Here’s where it gets really interesting. In the first photo, the moon has begun to rise to the left (north) of Cathedral Rock. At this time, PhotoPills was still indicating it would rise to the right (south) of Cathedral Rock (i.e., the far right edge of the photo).
Moonrise near Cathedral Rock, Sedona, Arizona.
That’s a pretty big error.
It turns out that PhotoPills can only be as good as the GPS and compass in the iPhone and those may not be very accurate. PhotoPills should not be blamed for what is an iPhone issue.
As the moon rose, I quickly moved to the south to attempt to get it between the spires but it was rising faster than I could reposition myself and I did not get the photograph that I wanted. That’s fine—as I have done this before and have a few great shots of the moon rising behind Cathedral Rock. (See, for example, Moonrise 1; Moonrise 2)
Moonrise near Cathedral Rock, Sedona, Arizona.
I’ll be using TPE for my next moon rise photo. I like PhotoPills for some of the other features it has—just not this one.
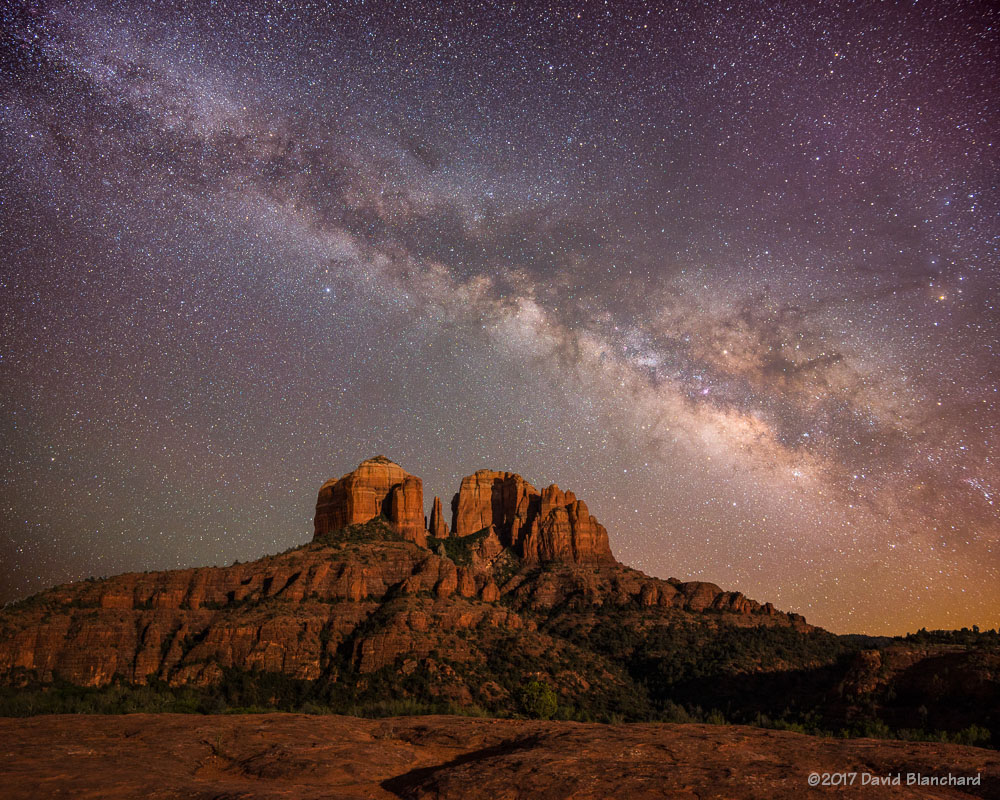
Winter is slowly coming to an end and we are about to transition into the warmer months of spring and summer. During these upcoming months, the center of our galaxy—The Milky Way—will be rising earlier each evening.
Milky Way rises above Cathedral Rock in Sedona, Arizona.
For photographers—and just about everyone else, too—staring up on a clear, moonless night with the Milky Way glowing above can be a magical experience. For those who live in brightly-lit cities, however, the Milky Way can be difficult or even impossible to see. From an article at PBS:
Light pollution — the needless shining of bright lights into the night sky — has robbed whole generations of the chance to see nature on its largest scale. It is estimated that as many as eighty percent of all the people alive today have never even glimpsed the Milky Way. (When a massive power outage struck southern California in the 1990s, Los Angeles residents reportedly called 911 to express alarm about strange clouds hovering overhead; they were seeing the Milky Way for the first time.)
With the rapid advancement of digital cameras in the past decade the ability to take images of the night sky has become remarkably easier. Not easy—just easier. Cameras can now take long exposures at high ISO settings to reveal details of the night sky not easily visible to the unaided eye. This has resulted in magnificent photographs of the Milky Way but also other objects such as comets and Deep Sky Objects (DSO).
Still, long exposures of the night sky can result in the stars leaving streaks (i.e., “star trails”) across the image. This is the result not of the stars moving, of course, but the earth’s rotation. Typical wide-angle lenses used for photographing the Milky Way are limited to about 15 to 30 seconds before trails become obvious. In order to capture enough night-sky light at these exposures requires high ISO settings which can add considerable noise to the image. Of course, sometimes star trails are desired as seen in the image below:
Star trails above Cathedral Rock in Sedona, Arizona.
Another option is to use a tracking device that follows the motion of the stars (or, more correctly, counteracts the rotational motion of the earth) allowing the camera to take very long exposures without star trails. The downside of this technique is while the stars remain pin points of light, the ground is blurred as the camera slowly moves during the exposure.
Long exposure without tracking (left) and with tracking (right).
The solution requires taking multiple images: one of the stars with the star tracker on and a second image of the ground with the tracker turned off.
The image shown at the top of this post is a composite to two images: one of the stars and one of the ground.
The star image was taken using the iOptron Skytracker, a relatively inexpensive tracker. The image was shot using a low sensitivity (ISO 400) to minimize sensor noise. The lens was an ultra-wide 16mm shot at f/4 and the duration of the exposure was 534 seconds (~9 minutes). The exposure for the foreground was shorter in duration (4 minutes) and at a higher sensitivity (ISO 1600).
The two images were combined as layers in Photoshop. Masks were applied to each of the images and then blended so that the pin-point stars on one image and the sharp foreground of the other image remained.
It turns out that taking the images was the easy and fun part. Standing around in the middle of the night watching stars, meteors, and satellites cross the sky can be very enjoyable. Not surprisingly, the blending of the images took many attempts and much time.